Breadmaking is an ancient culinary art that requires precision, patience, and the right tools. One essential tool for any aspiring bread maker is a bread-proofing heating pad. This handy device helps to create the perfect environment for your bread dough to rise, resulting in light, fluffy loaves with excellent texture and flavor. Whether you are a seasoned baker or a novice in the kitchen, mastering the art of bread making with a bread-proofing heating pad can take your baking skills to the next level.
The Benefits of Using a Bread Proofing Heating Pad
Using a bread proofing heating pad offers several advantages that can significantly improve your bread making process:
Consistent Temperature Control
- Ensure that your bread dough rises evenly every time.
- Eliminate guesswork when it comes to proofing your bread.
- Prevent temperature fluctuations that can affect the final outcome of your bread.
Faster Proofing Time
- Speed up the proofing process without compromising the quality of your bread.
- Reduce the overall time required to make homemade bread.
- Enjoy freshly baked bread in less time.
Space-Saving Design
- Compact and easy to store when not in use.
- Perfect for small kitchens or limited counter space.
- Convenient for apartment dwellers or bakers with limited storage options.
How to Use a Bread Proofing Heating Pad
Using a bread proofing heating pad is simple and straightforward. Follow these steps to get the best results:
Prepare Your Bread Dough
- Mix and knead your bread dough according to your recipe's instructions.
- Shape the dough into a ball and place it in a greased bowl for proofing.
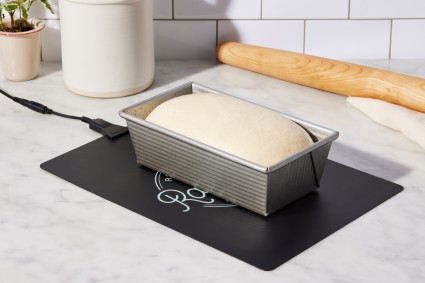
Set Up the Bread Proofing Heating Pad
- Place the heating pad on a flat surface, such as your kitchen counter or a table.
- Adjust the temperature settings on the heating pad according to your recipe's requirements.
- Place a clean kitchen towel or proofing basket on top of the heating pad to create a warm, draft-free environment for your dough.
Proof Your Bread Dough
- Cover the dough with a damp towel or plastic wrap to prevent it from drying out.
- Place the bowl with the dough on top of the heating pad and let it proof for the specified amount of time.
- Check the dough periodically to ensure that it is rising properly.
Bake Your Bread
- Once the dough has doubled in size, preheat your oven and prepare to bake your bread.
- Gently deflate the dough and shape it into a loaf or rolls, depending on your recipe.
- Bake the bread according to your recipe's instructions.
Tips for Using a Bread Proofing Heating Pad
Here are some additional tips to help you master the art of bread making with a bread proofing heating pad:
Experiment with Different Recipes
- Try a variety of bread recipes to see which ones work best with your bread proofing heating pad.
- Explore different types of bread, such as sourdough, whole wheat, or artisan loaves.
- Adjust the proofing time and temperature settings based on the specific requirements of each recipe.
Maintain Good Hygiene
- Keep your bread proofing heating pad clean and free of crumbs or spills.
- Wipe down the heating pad with a damp cloth after each use to prevent the buildup of bacteria or mold.
- Store the heating pad in a dry, well-ventilated area when not in use.
Practice Patience
- Allow your bread dough to proof at its own pace to develop complex flavors and a light, airy texture.
- Avoid rushing the proofing process, as this can result in dense, underproofed bread.
- Enjoy the meditative process of bread making and savor the delicious results.
With a bread proofing heating pad, you can elevate your bread making skills and create bakery-quality loaves in the comfort of your own kitchen. Invest in this essential tool and master the art of bread making today!